Buttermilk Angel Biscuits
/Happy new year, everyone! Yes, people, I have returned from my self-imposed blogging exile just in time to catch you when you're probably still in the throes of your post-holiday food coma and not the least bit interested in cooking, eating or planning the next meal. Great. But someday soon I promise you will return to the kitchen, and when you do, you will thank me for insisting that you make these ethereal little biscuits.
But before I tell you about them, how have you been? I really have missed you these past couple of months. Remember how I told you in my last post that I was going to spend my little hiatus getting my camera and computer equipment cleaned and researching new recipes and stuff like that? Nah. Didn't do any of that. I had such great intentions, but mostly what I did was barely manage to keep up with my crazy life and all the holiday shopping, cooking and partying. So now I need a vacation. But so do you, right?
Seeing as how neither of us is going to get one, I thought it might be nice to just cook you something super delicious. These little angel biscuits are so dang good that if you’ve been avoiding your kitchen since the holidays, these should send you running back there like your hair’s on fire. I mean it. These are the lightest, airiest, fluffiest and easiest biscuits ever. OK, the box of Bisquick is way easier, but no way are they this fluffy. I heart fluffy biscuits.
There have been several recipes for angel biscuits floating around the past few months and I really meant to make them during the holidays. I won’t bore you with all the reasons I never got around to it, but I must say they made a pretty great post-holiday treat.
And when I say they’re easy, I really do mean it. I know because I made them 3 times in one afternoon. If that seems excessive, it’s just that evidently I needed to practice being stupid. I forgot to put the baking soda in the first batch (I must tell you about these later); I accidentally set the oven to convection on the second batch and they got a might too toasty; and then (thank goodness) the third batch was just right.
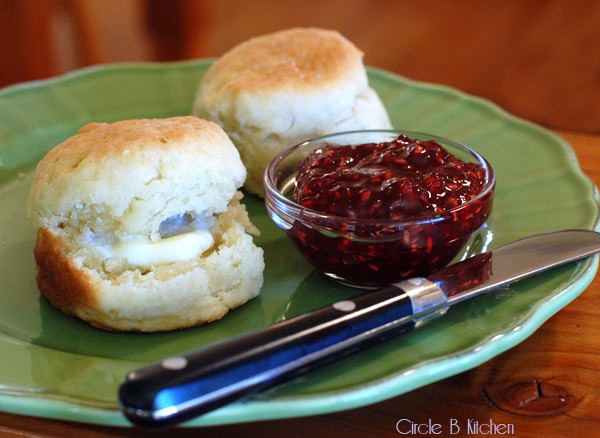
About those first biscuits that didn’t get the baking soda… they were so good. They didn’t rise much, so no fluffiness, but they came out like a heavy, sort of doughy dinner roll, but kind’ve flat, and I honestly could have eaten 5 or 11 of them. So if you forget the baking soda, do not despair.
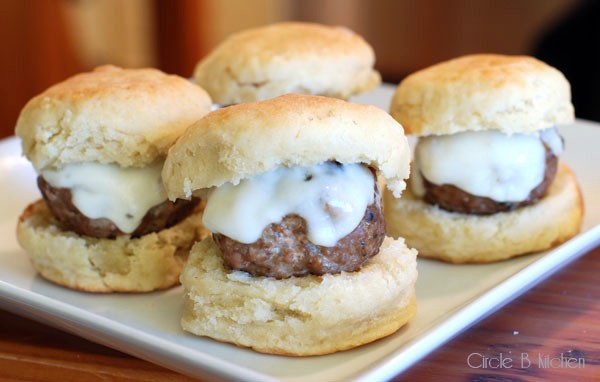
Happy New Year! I wish you lots of good eats in 2012 starting with Buttermilk Angel Biscuits! And as if they weren’t enough to jump start the year, it seems that angel biscuit sliders are pretty dang amazing too…
Here's the recipe...
BUTTERMILK ANGEL BISCUITS
click here for printable recipe
Recipe adapated from Favorite Recipes Press via Relish magazine
I made a few changes from the original recipe to make it even easier. If you have a food processor, you can throw these together in no time. The original recipe said it would make 18 to 24 biscuits, but that really depends on how thick you cut them. If you like your biscuits tall (which I do), roll the dough out to about an inch thick and you will get about 12 biscuits. If you want more than that, just roll the dough out a little thinner. These are good no matter how big they are.
Ingredients
1 pkg. active dry yeast
1/4 cup warm water
2 1/2 cups flour
1/2 teaspoon baking soda
1 teaspoon baking powder
1 teaspoon salt
2 tablesppons sugar
1 cup buttermilk
1/2 cup shortening, cut into pieces
Instructions
1. In a small bowl, dissolve the yeast in the warm water.
2. *To the bowl of a food processor, add the dry ingredients and pulse a few times to mix
3. Add the shortening and pulse a few more times until it forms little pebbles in the flour.
4. Add the buttermilk and yeast mixture and pulse until it forms a sort of sticky ball.
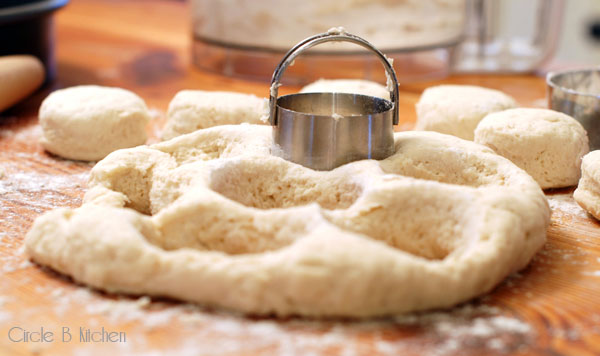
5. Turn the dough out onto a floured board and knead two or three times, just to form a ball and roll out to about ¾ to an inch thick.
6. Using a 2-inch cutter, cut out the biscuits and place them in a greased pan.
7. While the oven preheats, let the biscuits rise slightly (about 20 minutes). Bake for 12 to 15 minutes at 400F. Eat while warm.
*If you don’t have a food processor, no worries. Just mix your dry ingredients in a large bowl and “cut in” the shortening using a pastry cutter or two knives. I used the two-knife method to cut shortening and butter into my pie crusts for years before I had a food processor. Just angle the knives towards each other like scissors, sort of chopping through the flour until the shortening is the size of little pebbles and then continue with the recipe, adding in the buttermilk, etc.


